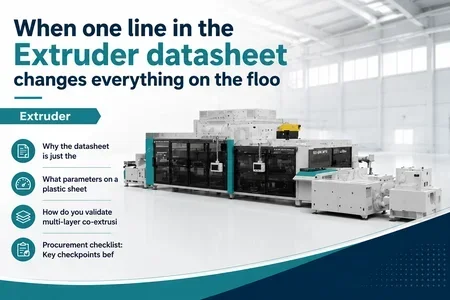
When one line in the Extruder datasheet changes everything on the floor
Article Overview: This article is written for procurement managers and sourcing teams evaluating plastic sheet extruders for production lines. It provides a practical, step-by-step framework to interpret datasheet claims, validate supplier specifications, and reduce implementation risk before issuing an RFQ. Whether you are upgrading a single extruder or planning a multi-layer co-extrusion line, the checkpoints below will help you align supplier promises with on-floor realities.
Why the datasheet is just the starting point
An extruder datasheet is a compact summary of performance claims. However, the same nominal output rate or screw diameter can translate into vastly different yields depending on resin type, die configuration, and downstream integration. Buyers who rely solely on headline numbers often discover, weeks after installation, that the line cannot hold gauge tolerances at the required speed or that melt temperature exceeds the material limit. The real cost is not just the machine price—it is the lost production hours while your team retrofits cooling zones or replaces screw designs.
To move from datasheet to procurement-ready evaluation, you must look past the first page. The following sections break down the parameters that deserve your focused attention, from screw geometry to control system architecture. Each checkpoint is designed to reduce the gap between spec sheet promise and floor performance.
What parameters on a plastic sheet extruder datasheet matter most?

Experienced procurement teams do not ask for a faster extruder; they ask for a consistent melt across the full output range. In sheet extrusion, uniformity affects downstream thermoforming and printing quality. The datasheet entries that correlate best with consistency include:
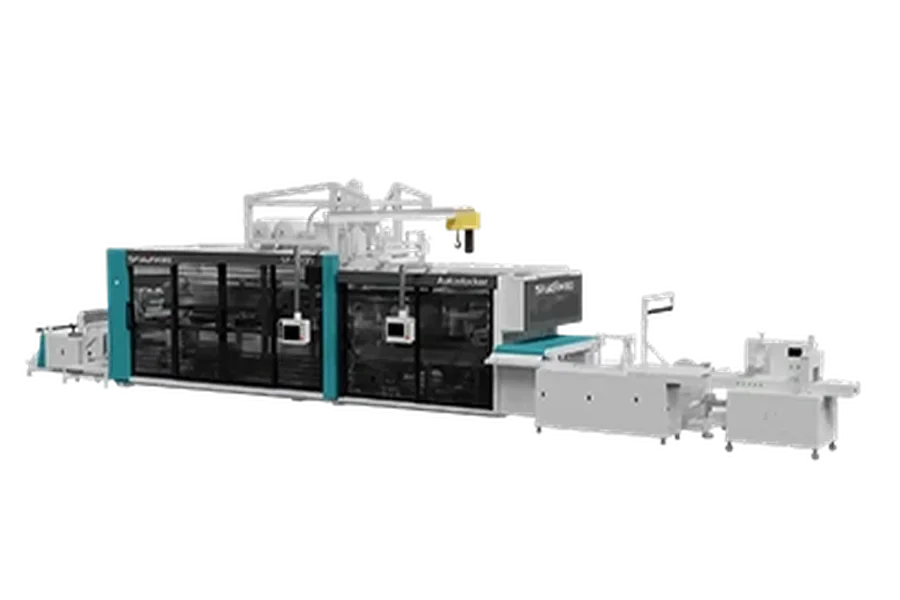
- L/D ratio and screw design: A typical general-purpose screw may work for commodity resins, but for engineered plastics or multi-layer structures, a barrier screw or mixing section is often required. The L/D ratio (usually 25:1 to 36:1) influences melting capacity and melt homogeneity.
- Temperature control zones: The number of heating/cooling zones on the barrel and adapter directly affects the ability to maintain a flat temperature profile. Five zones versus eight can mean the difference between a ±5 °C band and ±2 °C—critical when processing temperature-sensitive materials.
- Drive power vs. throughput: A 75 kW drive matched to 300 kg/h may look balanced, but if your target resin has higher viscosity, the actual throughput will drop. Look for torque-limited curves rather than a single maximum number.
- Die width and gap adjustment: For plastic sheet extruder applications, the die design—flex-lip vs. choker bar—governs how precisely you can set and maintain thickness across the web. Datasheets rarely spell out the adjustment mechanism in detail.
How do you validate multi-layer co-extrusion claims?
Multi-layer sheet lines are increasingly common in packaging and barrier applications. The datasheet for a multi-layer plastic sheet co-extruder often lists the number of layers and total throughput. Yet the real challenge is layer uniformity—not just whether each layer exists, but how evenly it is distributed from edge to edge. Validation should focus on three areas:
- Feedblock and manifold design: vane-type feedblocks produce sharper layer boundaries than modular stack systems. Ask the supplier for lab test reports showing layer consistency at 10% and 90% of maximum line speed.
- Pressure and temperature profiles per layer: Each extruder in a co-extrusion line must be tuned to the same melt viscosity window. If one extruder runs at 220 °C and another at 240 °C, the interface can become unstable. The datasheet should include independent temperature control for each extruder.
- Edge bead control: In sheet co-extrusion, edge beads are thicker than the centre. Without feedback trimming or an on-line gauge, you lose material and quality. Ask whether the system incorporates automatic die bolt adjustment or closed-loop thickness control.
A reputable supplier will offer visit reports from other co-extrusion installations. If the datasheet is silent on these points, treat it as a yellow flag.
Procurement checklist: Key checkpoints before RFQ
Before you send out an RFQ, systematically verify the following items with your shortlisted suppliers. Use this checklist as a minimum screening tool:
- Material compatibility: Request a trial run with your specific resin (or a closely matching grade). Confirm that the screw design and barrel material are suitable for corrosive or abrasive compounds if used.
- Line speed vs. thickness profile: Ask for a plot of gauge variation across the sheet width at three different line speeds. A flat profile at 10 m/min may drift at 20 m/min.
- On-line quality integration: Does the extruder support closed-loop thickness measurement from a downstream gauge? If not, you will need to add it later. The controller should accept external setpoints for die bolts.
- Spare parts and service lead times: Ask the supplier for a list of critical spares and their typical lead times. Downtime waiting for a screw or heater band can exceed the initial cost of the part.
- Reference installations: Visit at least one production site with comparable output and resin. Talk to the floor operators about maintenance ease, not just the sales manager.
One example scenario: a European packaging converter recently selected a 120 mm single-screw extruder because the datasheet showed a 500 kg/h output. After installation, they found that the actual throughput for their PET blend was only 320 kg/h because the screw geometry was optimised for PP. The cost of re-screwing the extruder and lost production totalled more than the original machine price. A pre-purchase test with their own material would have exposed the mismatch.
Reducing implementation risk through supplier evaluation
Supplier evaluation goes beyond the extruder itself. The total line performance depends on the multi-station thermoforming machine, plastic cup making machine, and auxiliary equipment that handle the sheet downstream. Your RFQ should include a compatibility statement: will the extruder interface with existing or planned downstream equipment? Ask the supplier to provide integration guidelines for screw speed synchronization, melt temperature control, and trim recycling.
Another area often overlooked is the supplier's own manufacturing capability. A company that machines its own screws and barrels can customise the geometry faster than one that buys standard components. Similarly, the quality certifications of the supplier give you a baseline for inspection and acceptance criteria. At minimum, ensure the supplier has a documented quality management system that covers material traceability, welding procedures, and final testing.
Finally, include a clause in your RFQ for on-site commissioning and operator training. The most accurate datasheet is useless if your team cannot maintain the process window. A supplier who offers a hands-on training period at their facility (or yours) signals confidence in their equipment and reduces ramp-up time.
FAQ
What is the most common mistake when reading a plastic sheet extruder datasheet?
Taking the maximum throughput number at face value without checking the resin type and screw speed at which it was measured. Most datasheets quote output for a single resin (often HDPE) at a specific screw speed. Your actual throughput will vary if your resin has different melt flow index or if you run at a different speed. Always ask for a full operating window table.
How do I know if a multi-layer co-extrusion line will produce consistent layer thickness?
Request layer uniformity data from the supplier at multiple line speeds. Look for a standard deviation of less than 5% of the total sheet thickness. Also ask about the feedblock type and whether the system uses independent extruder temperature control for each layer.
Should I buy a new extruder or retrofit my existing one?
Retrofitting can be cost-effective if the base drive and gearbox are in good condition and the new screw/barrel meet your throughput and material requirements. However, for multi-layer co-extrusion, a new line with matched extruders is often simpler to control. Consult the supplier for a feasibility study based on your current equipment.
What auxiliary equipment should I budget for alongside the extruder?
At minimum: a melt pump or screen changer for consistent melt pressure, an on-line gauge for real-time thickness measurement, a haul-off unit, a winder or cutter, and a recycling system for edge trim. The on-line crusher and auto cutting stacking machine are examples of auxiliary equipment that can close the loop for trim recycling.
How long does it typically take to commission a new sheet extrusion line?
Four to six weeks is a realistic estimate, including mechanical installation, electrical connection, and tuning of the process parameters. Multi-layer lines or those with complex down-stream automation may take eight weeks. Your supplier should provide a detailed commissioning timeline as part of the quotation.
Conclusion
The difference between a successful extruder procurement and a costly correction often lies in how deeply you read the datasheet and how thoroughly you validate the supplier's claims. By focusing on screw design, temperature control, layer uniformity, and integration with downstream equipment, you can significantly reduce implementation risk. Use the checklist provided, ask for material tests, and visit reference installations. When your team is clear on the practical limits—not just the headline numbers—the line will run as expected from day one. For further guidance on evaluating plastic sheet extruder specifications, contact your supplier or an independent process engineer before issuing the final RFQ.